
Infused Oil Techniques for Flavor Enhancement: A Comprehensive Guide
Have you ever wondered how a simple drizzle of flavored oil can turn a regular meal into something truly special? Infused oil techniques for flavor enhancement offer a simple yet effective way to boost your dishes with a burst of natural, aromatic goodness. In this guide, we’ll walk through the process of creating your own herb and spice-infused oils, explore the different methods available, and share some creative ideas to incorporate these oils into your everyday cooking.
Table of Contents
Understanding Infused Oil Techniques
Infused oils are oils that have been enriched with the flavors and aromas of herbs, spices, or other botanicals. By letting these ingredients steep in a neutral carrier oil, you can create a blend that enhances your meals without overwhelming them. This process is both art and science, combining careful ingredient selection with simple kitchen techniques.
What Are Infused Oils?
At its core, an infused oil is a product of a natural steeping process where a carrier oil absorbs the flavors from added ingredients. Whether using fresh basil, dried rosemary, or a hint of citrus peel, the oil gradually takes on a new character that can elevate a variety of dishes.
Benefits of Using Infused Oils
- Enhanced Flavor Profiles: A few drops of infused oil can add complexity to dressings, marinades, and even simple sautés.
- Versatility in the Kitchen: Infused oils work well in both raw and cooked applications, from drizzling over salads to finishing roasted vegetables.
- Subtle Health Boosts: Depending on the herbs or spices used, these oils may also contribute antioxidants and other beneficial compounds.
Applications
Infused oils are not just for cooking—they also find use in skincare and aromatherapy. In the kitchen, they can be used as finishing touches on dishes, while in beauty routines, they add a natural fragrance and nourishment to homemade lotions and massage oils.
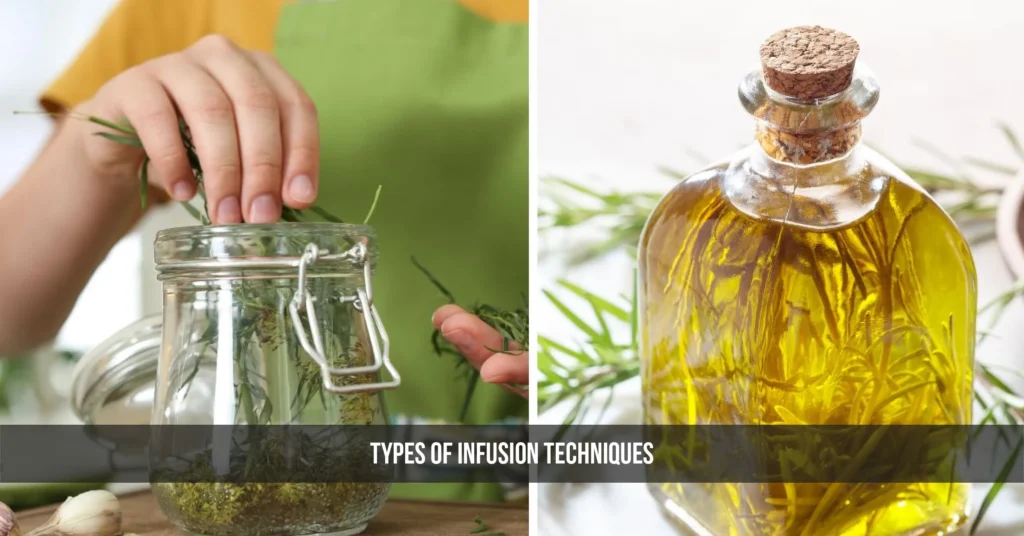
Types of Infusion Techniques
There are several ways to infuse oil with flavors, each with its own set of advantages and considerations.
Cold Infusion Method
Process:
- Place dried herbs or spices in a clean, dry jar.
- Pour a room-temperature carrier oil over the ingredients, ensuring they are fully submerged.
- Seal the jar and store it in a cool, dark place for 1-2 weeks, shaking gently every day.
Advantages:
- Preserves the delicate, natural flavors and nutritional benefits of the ingredients.
- Ideal for herbs and spices that are sensitive to heat.
Tips & Safety:
- Always use completely dried herbs to avoid any moisture, which could lead to spoilage.
- Keep the infused oil in a cool, dark location and use it within a month for the best taste.
Hot Infusion Method
Process:
- Gently heat your chosen oil in a saucepan using a double boiler or a low-heat setting.
- Add herbs, spices, or aromatics to the warm oil.
- Allow the mixture to simmer at around 180°F (82°C) for a short period, usually 5–10 minutes.
- Remove the oil from the heat, let it cool, and then strain out the solids.
Advantages:
- A faster method for extracting flavors, especially from sturdier ingredients.
- Works well when you need a quick infusion without the wait.
Comparison with Cold Infusion:
- While the hot method speeds up the process, it may slightly alter the taste of more delicate herbs compared to cold infusions.
Alternative/Advanced Methods
Some enthusiasts experiment with methods such as the alcohol intermediary infusion—where the herbs are first macerated in alcohol before combining with oil. Although this technique is primarily used for topical applications rather than culinary ones, it shows how creative you can get with flavor extraction.
Ingredients and Tools for Infusing Oils
Choosing a Carrier Oil
The choice of oil is essential because it forms the base of your infusion. A good carrier oil should have a mild flavor that doesn’t overpower the botanicals.
| Oil Type | Flavor Profile | Best Used For |
|---|---|---|
| Olive Oil | Fruity and robust | Mediterranean dishes, dressings |
| Sunflower Oil | Light and neutral | Baking, general cooking |
| Grapeseed Oil | Mild and clean | Sautéing, frying |
Tip: Always choose high-quality, preferably organic oils for the best flavor and health benefits.
Selecting Herbs, Spices, and Aromatics
When picking your flavoring agents, consider both the aroma and the intensity of the ingredients. Fresh or dried herbs like rosemary, basil, thyme, or even a hint of garlic work wonderfully. Citrus peels and chili flakes can also add a bright or spicy kick to your oil.
Essential Equipment
Having the right tools makes the process easier and ensures your infusion turns out as expected.
| Equipment | Purpose |
|---|---|
| Glass Jars | To store the oil and herbs during infusion |
| Fine Mesh Strainers | To strain out the solids for a clear finished oil |
| Double Boiler/Pot | For controlled, gentle heating during hot infusion |
| Thermometer | To monitor the oil temperature accurately |
Additional Tools: A clean cloth for drying herbs and a funnel for transferring the oil into bottles are also handy.
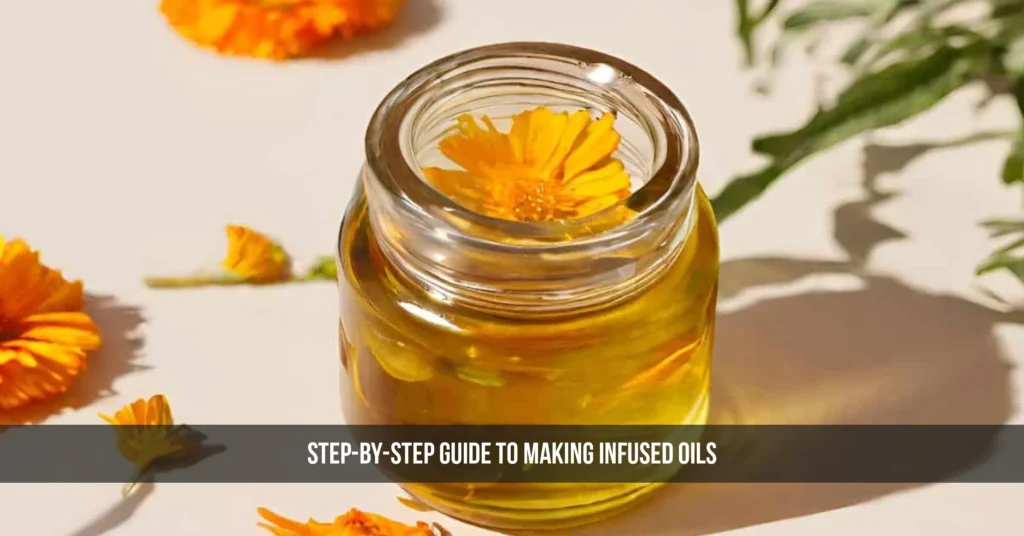
Step-by-Step Guide to Making Infused Oils
Creating your own infused oil at home is simple once you know the steps. Below is a detailed guide for both cold and hot infusion methods.
Preparing Your Ingredients
- Clean and Dry:
- Rinse fresh herbs thoroughly under cool water.
- Pat them dry with a clean towel, and if possible, let them air dry overnight to ensure all moisture is removed.
- Chop or Crush:
- Gently bruise or chop the herbs and spices. This increases the surface area and helps the oil absorb its flavors more effectively.
- For dried herbs, a light brushing with your fingers or a mortar and pestle can be beneficial.
Detailed Infusion Process
Cold Infusion
- Step 1: Place the dried herbs or spices in a clean, dry glass jar.
- Step 2: Pour your chosen carrier oil over the herbs, ensuring they are completely covered by at least an inch of oil.
- Step 3: Seal the jar tightly and give it a good shake to mix the ingredients.
- Step 4: Store the jar in a cool, dark place for 1-2 weeks, shaking it gently once a day to help the flavors meld.
- Step 5: After the infusion period, strain the oil using a fine mesh strainer or cheesecloth into a clean container.
Hot Infusion
- Step 1: Pour your carrier oil into a small saucepan or double boiler.
- Step 2: Warm the oil gently over low heat until it reaches about 180°F (82°C); using a thermometer can help you keep track.
- Step 3: Add your prepared herbs or spices to the warm oil.
- Step 4: Let the mixture simmer gently for 5–10 minutes, stirring occasionally to prevent burning.
- Step 5: Remove the saucepan from the heat and allow the oil to cool to room temperature.
- Step 6: Strain the oil through cheesecloth or a fine strainer to remove the solid particles.
Straining and Bottling
After your infusion is complete, the final step is to strain out the solids and bottle your oil for future use.
- Straining: Pour the infused oil through a strainer lined with cheesecloth into a clean bowl. Press gently to extract as much oil as possible.
- Bottling: Use a funnel to transfer the strained oil into dark glass bottles. Label the bottles with the type of infusion and the date of preparation to keep track of freshness.
Storage and Shelf Life
- Cold Infused Oils: Store in a cool, dark place or in the refrigerator for up to one month.
- Hot Infused Oils: Generally best kept in a cool, dark place, and used within one month as well.
- Tip: Always check the oil for any off smells or changes in color before use, as these can be signs of spoilage.
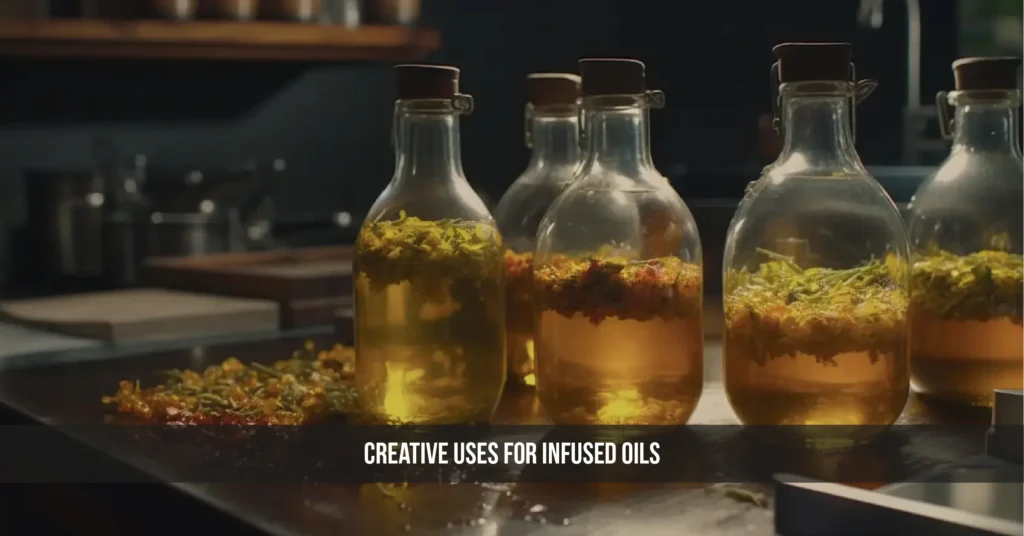
Creative Uses for Infused Oils
Now that you have your homemade infused oils ready, let’s explore how to make the most out of them in your cooking and beyond.
Culinary Applications
Infused oils can truly transform a dish with their concentrated flavor. Here are some ideas to get you started:
- Salad Dressings: Drizzle a bit of basil or citrus-infused oil over your salads to add a burst of flavor. Mix with vinegar and a touch of honey for a zesty vinaigrette.
- Marinades: Use infused oil as a base for marinades. Whether you’re preparing chicken, fish, or vegetables, a few spoons of infused oil can make your marinade more aromatic.
- Sautéing and Roasting: Replace your regular cooking oil with a flavored one when sautéing vegetables or roasting meats. This subtle switch can add a new dimension to familiar dishes.
- Finishing Touch: A light drizzle of infused oil can finish off a dish. Think of it as the final flourish on grilled meats, steamed vegetables, or even over pasta.
Non-Culinary Applications
Infused oils aren’t just for the kitchen. Their natural aromas and properties make them suitable for other creative uses:
- Skincare: Some infused oils can be used as a base for homemade lotions, balms, or massage oils. For example, lavender-infused oil can add a soothing aroma and gentle moisturizing effect.
- Aromatherapy: Use a few drops of infused oil in a diffuser or add them to bathwater for a relaxing soak.
- Gift Ideas: Homemade infused oils make for thoughtful and unique gifts. Package them in decorative bottles with a personalized label, and share a taste of your creativity with friends and family.
Conclusion
Infused oil techniques for flavor enhancement bring a delightful twist to everyday cooking, transforming simple dishes with a burst of natural taste. Experiment with different herbs, spices, and methods to create a personalized flavor that reflects your style. Enjoy the creative process and share your flavorful discoveries with friends.
Also Read: Master Dry vs. Moist Heat Cooking Differences Today
FAQs
What are the best herbs and spices to use for infusion?
Fresh herbs like basil, rosemary, and thyme work great, while dried ingredients such as chili flakes and citrus peel provide a more concentrated flavor. Choose ingredients that suit the dish you’re planning to create.
How long should I let the oil infuse using the cold method?
Typically, cold infusions require 1 to 2 weeks for optimal flavor. This timeframe allows the oil to gently absorb the herb’s essence without compromising its delicate notes.
How can I tell when my oil is infused enough?
Taste a small sample after the recommended period; if the flavor feels balanced and pronounced, it’s ready. If you desire a stronger taste, you can let it sit for a few more days and test again.
What are the best storage practices for infused oils?
Store infused oils in dark glass bottles with airtight lids, and keep them in a cool, dark place or refrigerator. This helps maintain their flavor and extends their shelf life.
Can infused oils be used for both cooking and skincare?
Yes, many infused oils work well in culinary applications and as bases for homemade skincare products. Just be sure that any ingredients used for skincare are safe and suitable for topical use.


Post Comment